
FTC-U Workshop 01-05
Class length is approximately 2 hrs and 15 minutes.
Commands Question
Begins at 3:00 of the video. Duration 13 minutes.
Trevor received this question from Betty asking for more information about the Commands tab in the properties box. Trevor shows how to find the start and end points of a shape and looks at what the choices are for stop or jump and what the tie in and tie off are for. 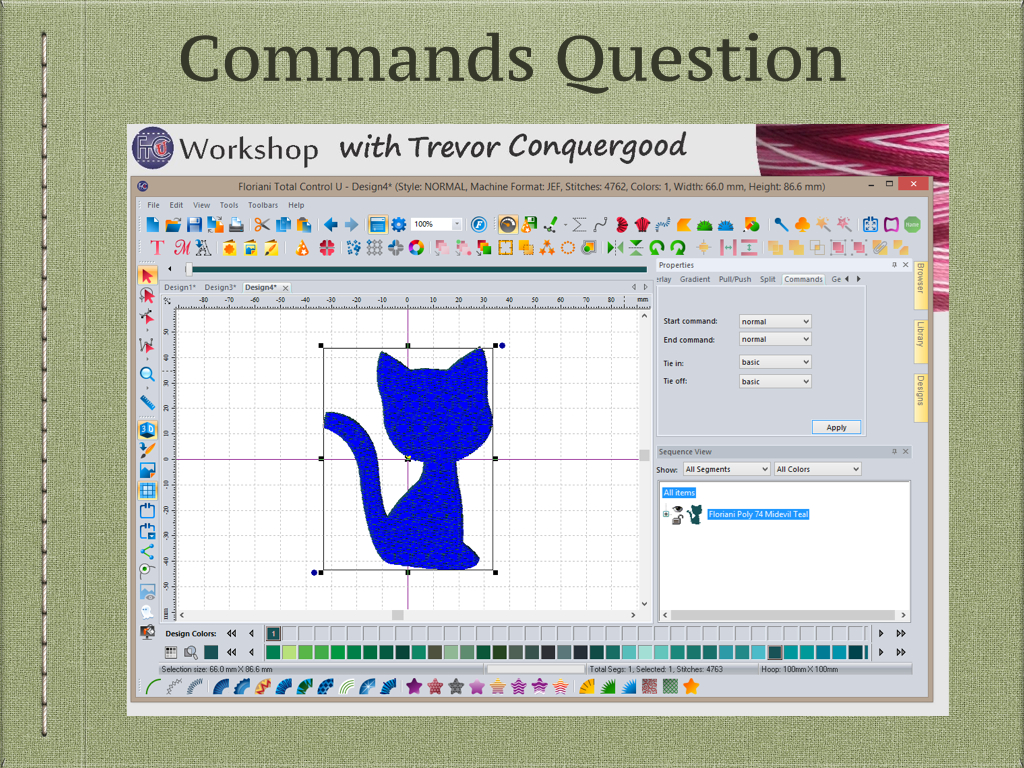
Lettering Tool Review
Begins at 16:00 of the video. Duration 23 minutes.
Trevor begins to work with lettering in this review of the basics of strait text. It is important you know how to change between select mode where you can transform the lettering and text edit mode where you can change the letter spacing with the yellow and blue handles. 
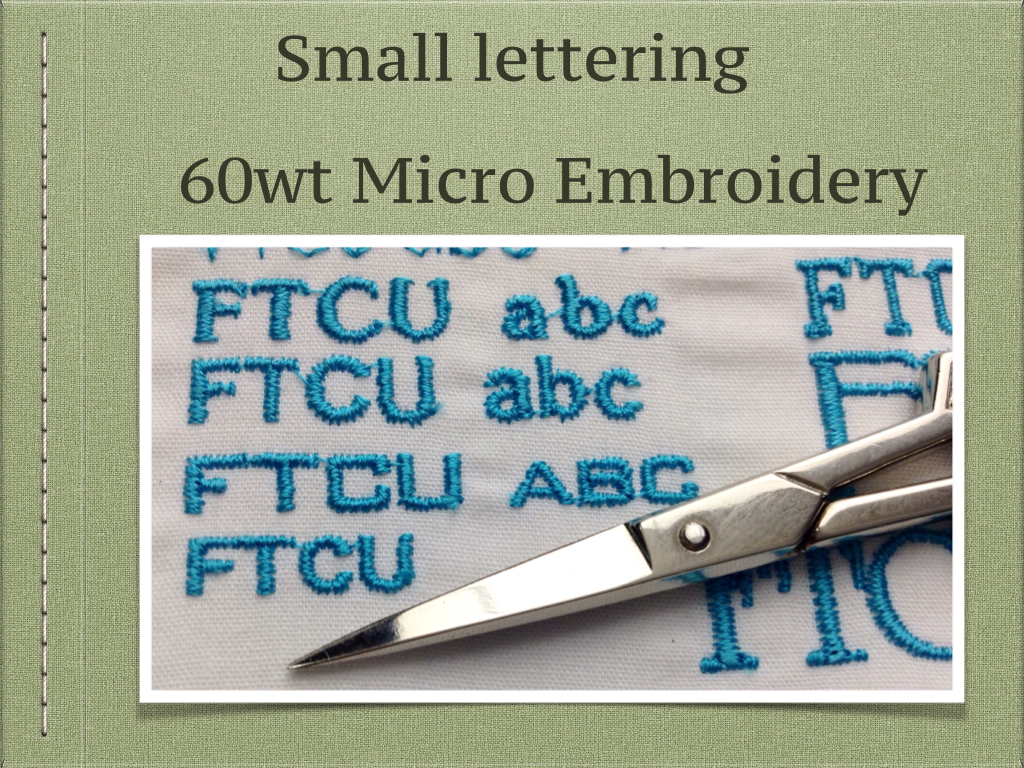
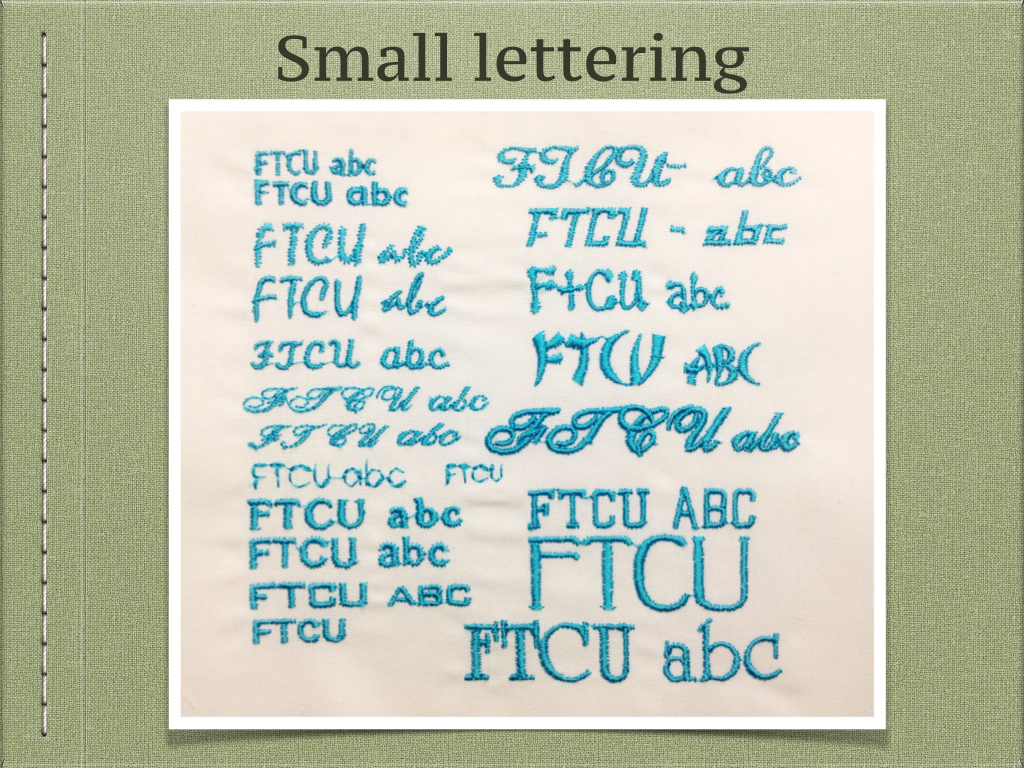
Small Lettering
Begins at 39:00 of the video. Duration 38 minutes.
How small can you sew and what fonts will look best at 7mm and smaller sizes is the topic of this segment. Trevor shows what is different in the “small” sized fonts compared to the same font for larger sizes. Trevor creates a design using several of the “small” sized fonts and stitches it out using regular 40wt thread and then again using micro 60wt thread. Both are successful with 4mm letters.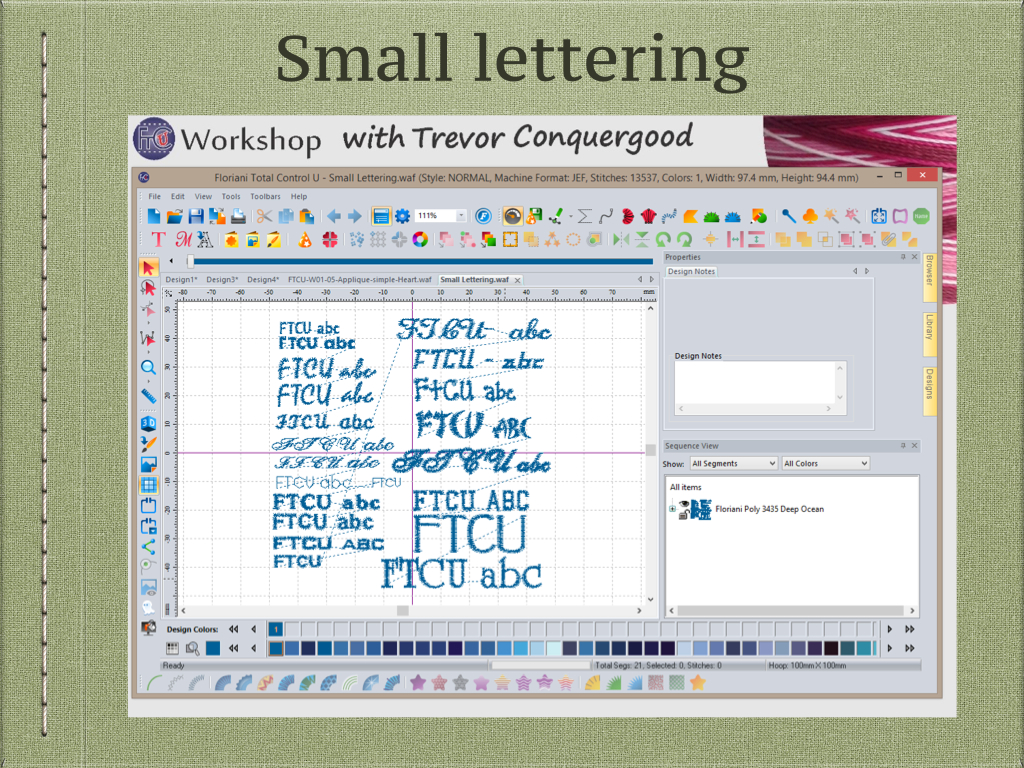

Bezier Line Question
Begins at 1:17:45 of the video. Duration 13 minutes.
Trevor received an email from Bob who is asking about the bezier tool and how to make a hard corner when drawing shapes. Trevor reviews all three drawing modes, Line (S) Pen (F) and Bezier (B) and shows how to use each to create almost any shape including a curve that turns into a corner.
Stitch Length Question
Begins at 1:30:45 of the video. Duration 15 minutes.
Janie sent in an email with an image of a design she is working on asking if there is a maximum stitch length that will sew ok. Trevor explains that the software will add a jump in between stitch points if you create a satin that is longer than about 7mm. Learn about the split tab in the properties box. 
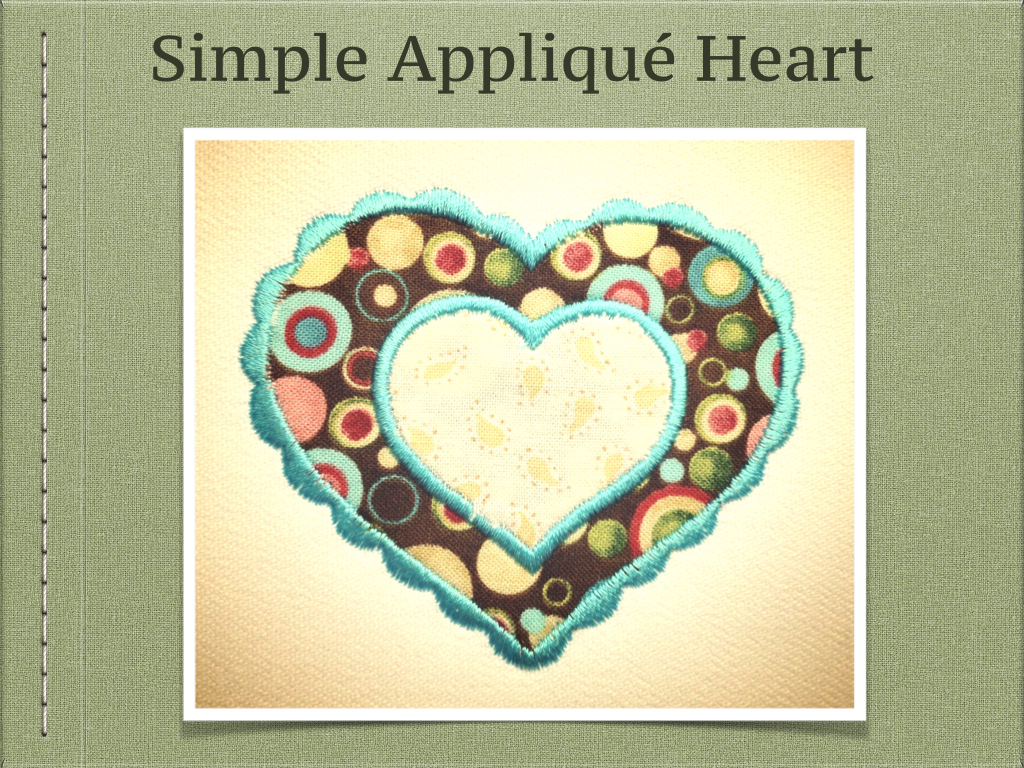
Simple Appliqué Heart
Begins at 1:45:00 of the video. Duration 8 minutes.
In this segment Trevor begins to look at creating appliqué shapes. The appliqué tool will add the steps needed to sew the appliqué material. You can use the properties box to adjust the settings for the style of cover stitch or turn it off if you want to make your own cover.

Appliqué Question
Begins at 1:53:00 of the video. Duration 6 minutes.
Anne sent in an appliqué design with some questions about how to improve the results. This is a good example of using appliqué and removing the auto satin cover. Then you create your own satin border that can skip some places where other embroidery will fill in and the cover is not needed. 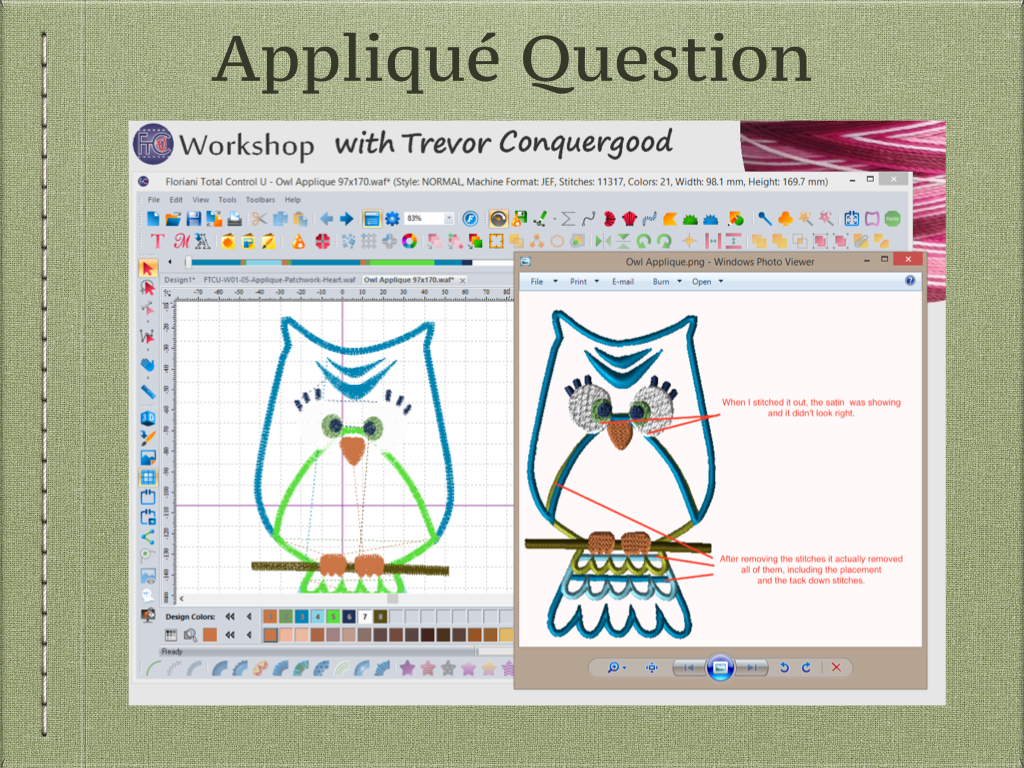
Patchwork Appliqué Heart
Begins at 1:59:30 of the video. Duration 15 minutes.
Trevor actually uses the run line tool to manually create appliqué to have full control of how it sews. This design is created from a photo of a tattoo and is a good example of creating appliqué that has several layers and using a satin cover for the outside and then motif lines for the inside cover. 


