 FTC-U Workshop 02-03
Class length is approximately 2 hrs and 40 minutes.
Binder Cover Border
Begins at 3:45 of the video. Duration 37 minutes.
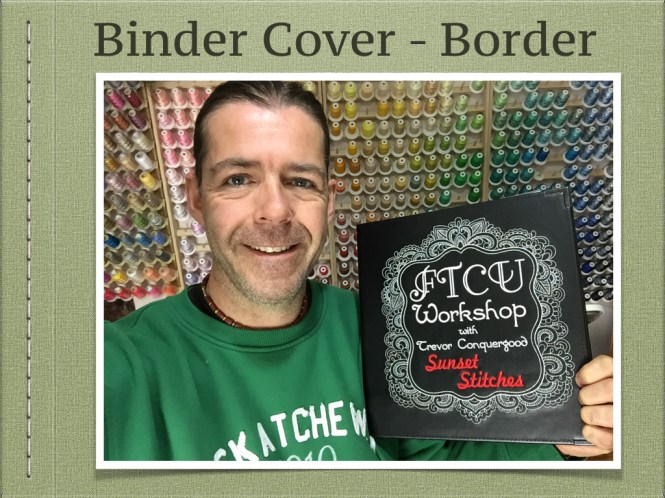
Are you making an FTCU Binder? Trevor wants all members to print out the PDF pages of the classes and make a binder for easy reference. Trevor recently made some very attractive custom binders as a thank you to the Floriani National Educators for all of their help and support of Trevor’s classes. In this segment Trevor talks about sewing on Vinyl using Perfect Stick Cutaway and also shows how to use the drawing tool to make the beautiful binder border design. Trevor shares the design with the class. Would you like to win one of these beautiful custom made binders? Trevor wants you to send him a photo of yourself holding your FTCU-Workshop binder. Thats it Trevor will get his mom Wendy to help make a draw from the names of everyone that sends in a photo. There is no need to make a custom binder to enter the contest as any binder is acceptable. Trevor plans to show some of the photos in class when he makes the draw. Email your photo by September 30th for a chance to win.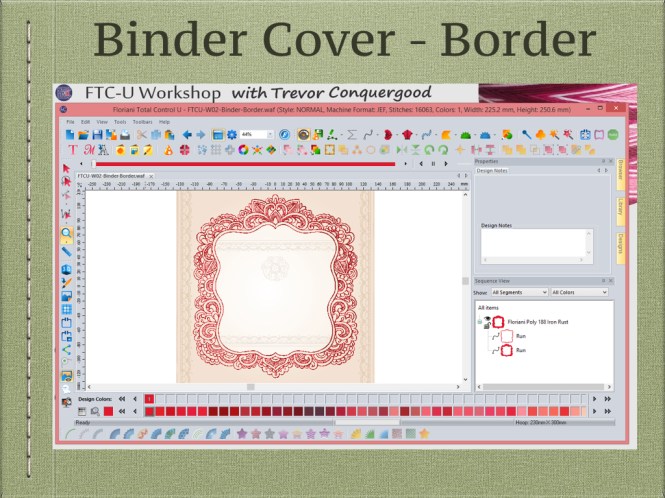

Create a Custom Hoop
Begins at 41:00 of the video. Duration 2 minutes.
In this segment Trevor shows how to add new custom hoop sizes that are not included with the software. From the select hoop tool you can choose to create a new hoop, where you can choose from oval or rectangle hoops and set the size. Give the new hoop a name to help identify it and you are all set. 
How to Crop with Microsoft Paint
Begins at 43:30 of the video. Duration 12 minutes.
Some times you have an image and you want to use just a small part of it. As a backdrop that is no problem but if you want to use auto digitizing it will work better if you crop the artwork first. Trevor shows how to use Microsoft Paint to crop out part of an image and then save the new part in any of several different backdrop formats. 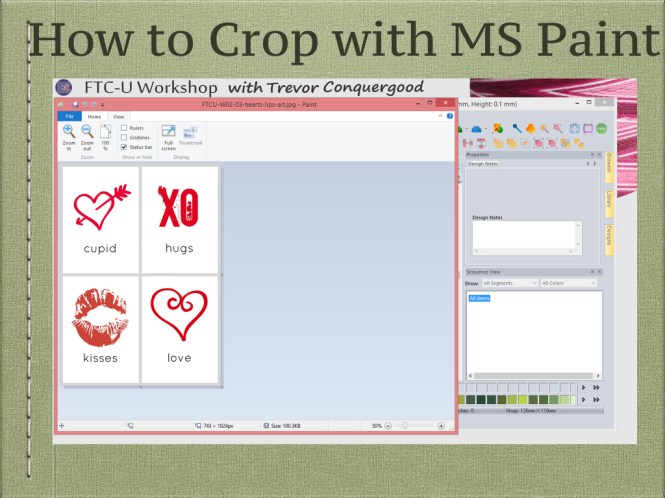
Auto Digitize – Heart
Begins at 55:45 of the video. Duration 18 minutes.
This is one of the images that Trevor cropped out of a larger image in the previous segment. It works well with auto digitizing and Trevor looks at how results change based on the size you choose in the auto digitizing wizard. Smaller makes a satin path with turning angle stitches. Larger makes fill all at the same angle. 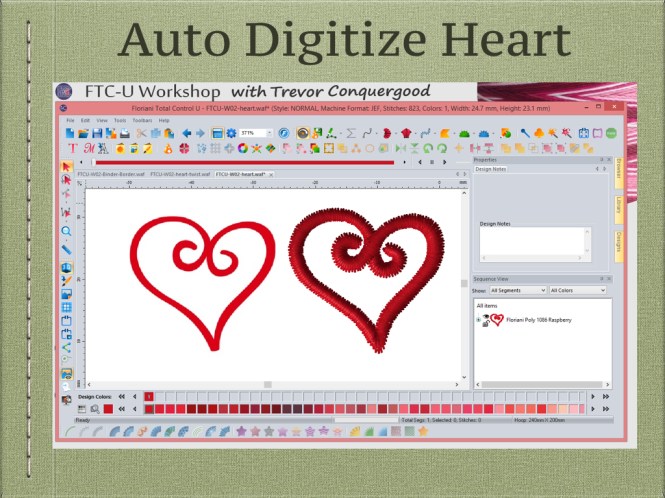

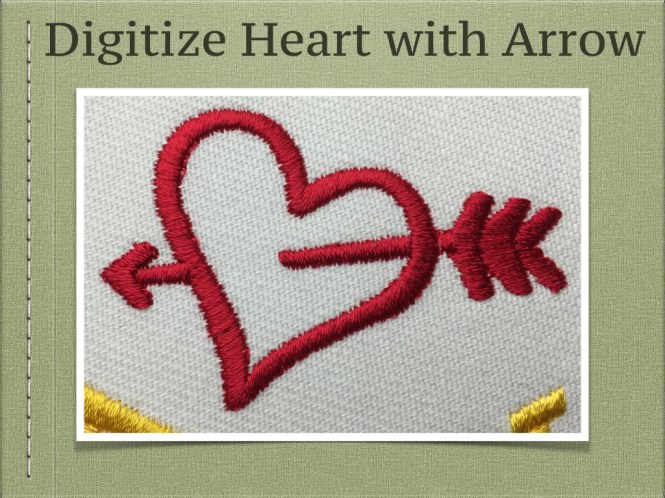
Digitize Heart with Arrow – Classic Satin Tool
Begins at 1:13:30 of the video. Duration 22 minutes.
Trevor tries to auto digitize this image and the results are ok but not good enough to satisfy Trevor because he knows it would only take a few minutes more to use the classic satin tool and make the shapes himself. The results are excellent and just as intended. 
Digitize Lips – Manual Tool
Begins at 1:35:30 of the video. Duration 13 minutes.
Trevor attempts to auto digitize this image however the results are not so great because there are too many stitches in a small design. Trevor uses the manual tool to digitize the images one stitch at a time. The results look great and are 1/4 of the number of stitches in the auto digitized version. 

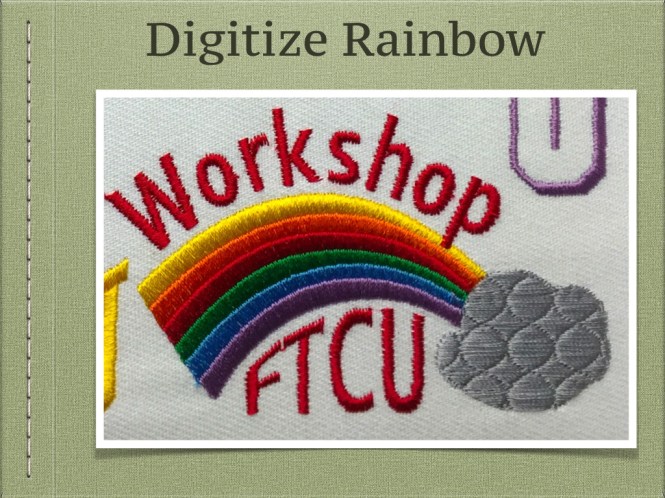
Digitize Rainbow – Vector Artwork
Begins at 1:56:00 of the video. Duration 13 minutes.
This rainbow artwork comes from the custom shapes tool in the easy artwork choice. This is vector artwork and that means you can simply select the shapes and choose the style of stitching. Trevor also shows how to add additional pull compensation to the rainbow to avoid any gaps between the colours. 
Digitize – Heart with Twist
Begins at 2:09:30 of the video. Duration 6 minutes.
Trevor opens up a backdrop of some Subway Art and then digitizes the heart with twists using the classic satin tool. If the design is small it is ok to let the satin stitch sew over top of the other side of the twist however if you plan to use it larger you will need to break the column to avoid too much overlapping stitching. 
Lettering – Subway Art
Begins at 2:15:00 of the video. Duration 25 minutes.
Trevor begins this segment with a review of the lettering tool and creative ways to use text with digitized designs to create a Subway Art style designs. 

