 FTC-U Workshop 02-08
Class length is approximately 2 hrs and 18 minutes.
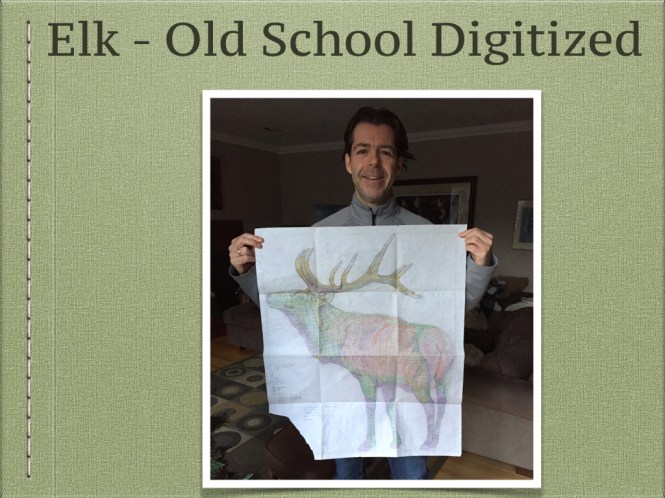
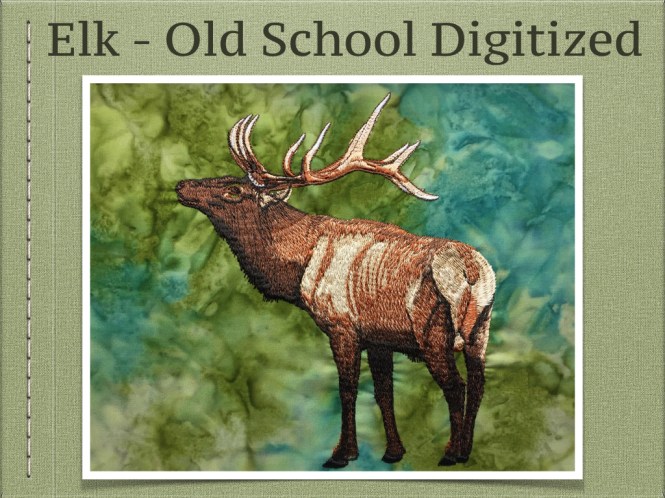
Elk – Old School Digitized
Begins at 17:15 of the video. Duration 27 minutes.
There is a lot you can learn from a design that was manually digitized many years ago. This ELK design is a wonderful example of the technique of blending colours together to create a realistic embroidery of an animal. Trevor shares the design so you can learn by watching it stitch out. 


Drawing Modes – Review
Begins at 44:45 of the video. Duration 6 minutes.
This segment is a review of the three main modes of drawing lines and shapes. Choose from (S) = Line mode where you click for a corner and hold control plus click for a curve. Use (F) = pen mode to freehand draw shapes. Bezier (B) mode uses left click to make corners and left click + drag for curves. 
Digitizing Tools – Review
Begins at 50:15 of the video. Duration 20 minutes.
In this segment Trevor reviews how to use all of the hands on digitizing tools. Learn to create lines that can either be manual, run stitch or steil stitch (satin column). Learn to use the complex fill tool and how to add holes to the shapes. Learn to create a satin path with either classic or outline methods. 
Digitize – Miss Chief – New School – Manual
Begins at 1:10:45 of the video. Duration 55 minutes.
In this segment Trevor digitizes this cute little kitty called “Miss Chief” using the old school manual method. The old paper draft is replaced with on screen digitizing but we can still use all of the “old school” techniques to create fur. Of course we have some pretty awesome new tools to use that were not around in the “old days” and Trevor says the trick is to learn to blend manual stitches with segments of satin and fill made using our new tools. Manual “one stitch at a time” digitizing may not be for everyone but it is very interesting to see how it is done at very least and the design is adorable. 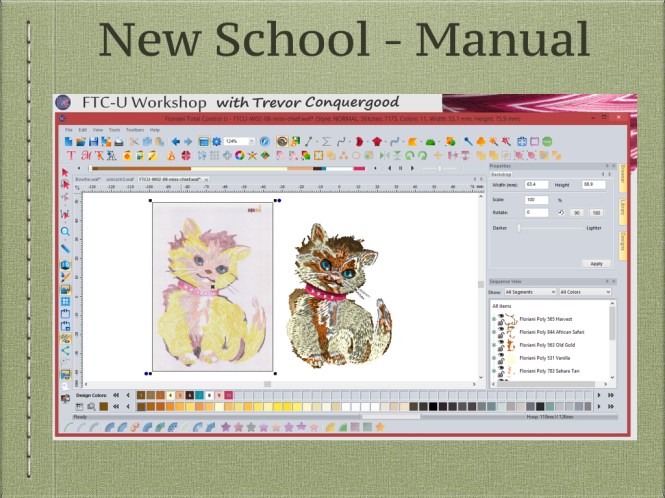


Spirograph – Question and Review
Begins at 03:00 of the video. Duration 10 minutes.
This segment is actually at the begging of the class when Trevor receives an email with some photos of Spirograph stitch outs made after the pervious class. Trevor reviews the choice of combining the shapes or sewing them individually and weighs the pros and cons of both.

Motif Fill – Question and Review
Begins at 1:56:30 of the video. Duration 15 minutes.
Trevor received a question from Linda on how to get this design to work as a pattern fill. However Trevor is confused and shows how to create it as a motif fill and not a pattern fill. LOL This is a good review of motif fill and Trevor plans to review pattern fill next class.
Unicorn Design Review
Begins at 2:10:30 of the video. Duration 7 minutes.
Trevor received this design from Tom and it looks great. Trevor suggests using a satin fill for the outlines as it will be less stitches however some challenges need to be resolved to use that method. Great job Tom!
New line here
